When dealing with sewage damage, it’s vital to approach the situation methodically. Start by evaluating the extent of the damage to understand what you’re up against. Safety precautions can’t be overlooked; wearing protective gear is essential. After you’ve secured your safety, the next steps involve removing contaminated materials and thoroughly cleaning the affected areas. But that’s just the beginning of what you need to know for effective restoration.
Key Takeaways
- Conduct a thorough damage assessment to identify contamination levels and affected materials for effective restoration planning.
- Prioritize safety by wearing appropriate protective gear and ensuring proper ventilation during the restoration process.
- Remove and dispose of all contaminated materials responsibly to maintain a safe living environment.
- Utilize high-powered pumps and wet vacuums specifically designed for sewage removal to ensure efficient extraction.
- Monitor moisture levels with moisture meters and schedule regular follow-ups to prevent future issues and ensure complete drying.
Assess the Damage Thoroughly
When faced with sewage damage, it’s crucial to assess the situation thoroughly before taking any further steps.
Start with a detailed damage evaluation, identifying the source and extent of the contamination. Use inspection techniques like visual assessments and moisture meters to detect hidden water damage.
Document the areas affected, noting materials that may need replacement, such as drywall or flooring. Pay attention to odors, as they can indicate the severity of the damage.
Remember to check for mold growth, which can develop quickly in damp conditions.
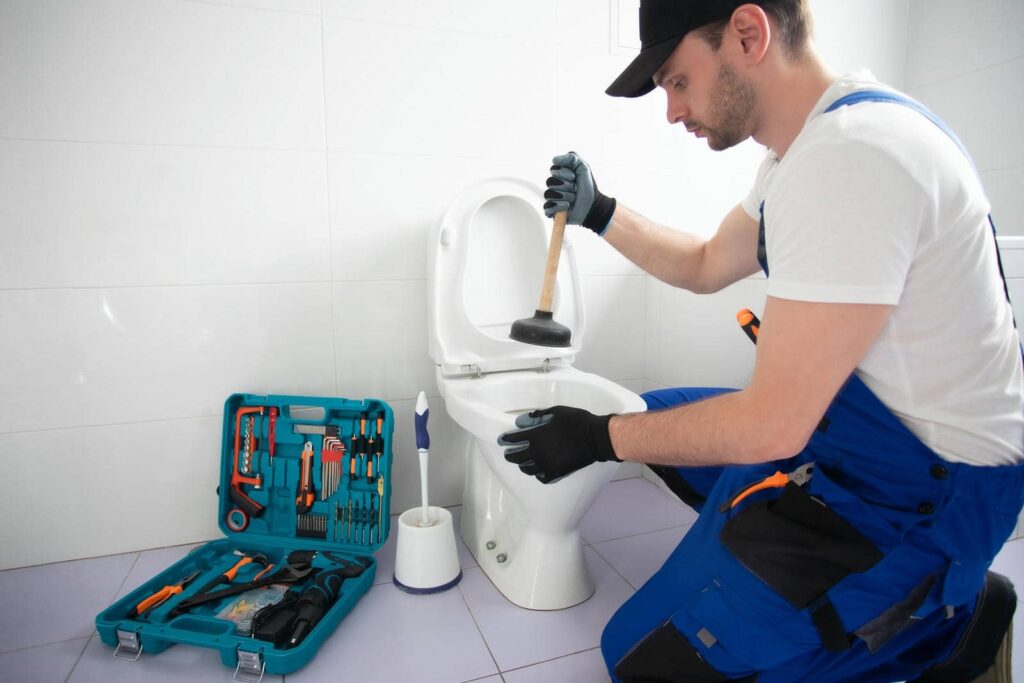
Ensure Safety Precautions
After evaluating the damage, prioritizing safety precautions is essential to protect yourself and others from health hazards associated with sewage exposure.
Start by donning appropriate safety gear, including gloves, masks, and goggles, to minimize direct contact with contaminants.
Establish hazard awareness by identifying potential risks in the area, such as exposed electrical wiring or unstable structures.
Guarantee proper ventilation to reduce airborne pathogens, and keep bystanders away from the affected zone.
If necessary, consider using a respirator for added protection.
Always have a first aid kit readily accessible in case of accidents.
Remove Contaminated Materials
As you begin the restoration process, it’s crucial to systematically remove contaminated materials to prevent further health risks and damage.
Using effective removal techniques not only safeguards your health but also fosters a sense of community as you work toward restoring your space.
Follow these steps:
- Identify all contaminated items, including furniture and carpets.
- Wear protective gear****, such as gloves and masks, to guarantee your safety.
- Carefully remove materials, ensuring they’re bagged securely to contain pathogens.
- Dispose of responsibly at designated waste facilities to protect the environment.
Taking these actions not only protects you but also reinforces your commitment to a safe and healthy living space for yourself and those around you.
Clean and Disinfect Affected Areas
After removing contaminated materials, you need to assess the contamination levels in the affected areas.
Choose appropriate disinfectants based on the severity of the contamination, and apply them systematically to guarantee full coverage.
Finally, make certain to thoroughly dry all surfaces to prevent mold growth and further issues.
Assess Contamination Levels
To effectively assess contamination levels in areas affected by sewage damage, start by identifying the type of waste involved—whether it’s categorized as black, gray, or clean water.
Understanding contamination sources is essential to guarantee a thorough restoration process. Here’s a methodical approach:
Inspect the area: Look for visible signs of sewage, such as stains or odors.
Test surfaces: Use appropriate testing kits to determine contamination levels on various materials.
Evaluate the extent: Note how far the contamination has spread to identify affected areas.
Document your findings: Keep a detailed record to guide your cleaning and restoration efforts.
Use Appropriate Disinfectants
Once you’ve assessed the contamination levels, the next step involves using appropriate disinfectants to clean and disinfect affected areas.
Start by selecting disinfectant types suitable for sewage contamination, such as chlorine bleach, hydrogen peroxide, or quaternary ammonium compounds. Each has unique properties that effectively eliminate pathogens.
Next, employ proper application techniques. Use a spray bottle or mop to apply the disinfectant evenly, guaranteeing you cover all surfaces thoroughly.
Allow the disinfectant to sit for the recommended dwell time to maximize its effectiveness.
After the disinfecting process, be sure to follow up with a rinse if required, especially in areas that come into contact with food or skin.
This meticulous approach guarantees a safer environment for you and your community.
Ensure Thorough Drying
While disinfecting is essential, ensuring thorough drying of affected areas is equally important in preventing mold growth and further contamination.
Effective moisture control is vital in this process. Here are some drying techniques you should consider:
Ventilation: Open windows and use fans to promote air circulation.
Dehumidifiers: Invest in dehumidifiers to extract excess moisture from the air.
Absorbent Materials: Use towels or absorbent pads to soak up standing water and moisture.
Heat Sources: Utilize heaters to elevate the temperature, which can speed up the drying process.
Dry Out the Space Completely
As soon as you’ve removed any standing water, it’s vital to dry out the space completely to prevent further damage and mold growth.
Start by using dehumidifiers and fans to enhance air circulation and promote moisture control. Position fans strategically to guarantee airflow reaches all affected areas, including corners and under furniture.
Monitor humidity levels with a hygrometer; aim for below 50% to inhibit mold development. If possible, open windows to facilitate cross-ventilation, but be cautious of outside humidity.
Inspect hidden spaces, like walls and floors, for residual moisture, and use specialized equipment if necessary.
Repair and Restore Damaged Structures
After ensuring the space is completely dry, you need to assess the structural integrity of affected areas.
Identify and remove any contaminated materials that compromise safety and stability.
Once that’s done, implement effective water extraction techniques to prevent further damage and facilitate the restoration process.
Assess Structural Integrity
To effectively restore structures affected by sewage damage, you must first assess their structural integrity. A thorough structural assessment is essential to guarantee safety and long-term durability.
Follow these steps for a detailed integrity evaluation:
Inspect Materials: Check for signs of corrosion, warping, or other damage in beams and supports.
Evaluate Load-Bearing Capacity: Assess if the structure can safely bear its intended loads post-damage.
Test for Moisture: Use moisture meters to identify hidden dampness that could lead to mold growth.
Engage Professionals: Consult structural engineers to validate your findings and recommend necessary repairs.
Remove Contaminated Materials
Removing contaminated materials is essential for restoring structures affected by sewage damage. Start by donning appropriate safety gear, including gloves, masks, and goggles, to protect yourself from harmful pathogens.
Carefully identify and list all contaminated items, such as carpets, drywall, and insulation. These materials often can’t be salvaged and must be disposed of according to local regulations.
Use a methodical approach: begin in the most affected areas, ensuring you contain waste to prevent cross-contamination. As you remove each item, seal them in heavy-duty plastic bags to avoid spreading contaminants.
Thoroughly document the disposal process for insurance claims and future reference. This systematic removal not only safeguards your health but paves the way for effective restoration.
Implement Water Extraction Techniques
Effective water extraction is essential for mitigating further damage to structures affected by sewage. By employing efficient extraction methods, you can protect your home and restore its integrity.
Follow these steps to guarantee successful water damage recovery:
Assess the Area: Identify the extent of water damage to determine the necessary extraction approach.
Choose Proper Equipment: Utilize high-powered pumps and wet vacuums specifically designed for sewage extraction.
Implement Techniques: Use techniques like submersible pumping and extraction wands to remove contaminated water swiftly.
Monitor Moisture Levels: After extraction, use moisture meters to check for residual dampness and guide drying efforts.
Prevent Future Sewage Issues
While you can’t predict every sewage issue, implementing proactive measures can considerably reduce the risk of future problems.
Start by scheduling regular maintenance checks for your plumbing system. This includes inspecting pipes, faucets, and fixtures for leaks or blockages that could escalate into bigger issues.
Ascertain proper drainage around your property; clear gutters and downspouts to prevent water accumulation that may lead to sewage backups.
It’s also wise to avoid flushing non-biodegradable items down the toilet, as this can severely disrupt your sewage system.
Finally, consider installing a backflow prevention valve.
Frequently Asked Questions
How Long Does Sewage Damage Restoration Typically Take?
Sewage damage restoration typically takes a few days to several weeks. The restoration timeline depends on factors affecting the extent of damage, the materials involved, and the efficiency of your restoration team. You’ll want to assess carefully.
Can I Handle Sewage Damage Restoration Myself?
You can tackle sewage damage restoration yourself, but beware of DIY restoration risks. Master sewage cleanup techniques, yet make certain you’re equipped for hazardous materials. Sometimes, a professional’s touch is essential to safeguard your health and home.
What Are the Costs Associated With Sewage Damage Restoration?
Sewage damage restoration costs vary widely, typically ranging from $1,000 to $5,000. A thorough damage assessment is essential, as it determines the extent of contamination and necessary repairs, guiding you in budgeting effectively for restoration.
Will My Insurance Cover Sewage Damage Restoration?
Your insurance policy might cover sewage damage restoration, but it depends on your coverage limits. Review your policy details and consult your insurer to understand what’s included and any potential out-of-pocket expenses you could face.
How Can I Identify Sewage Issues Before They Escalate?
You can identify sewage issues early by regularly inspecting your plumbing for leaks and blockages. Pay attention to sewage odor detection; any unusual smells often indicate problems that need immediate attention before they escalate.
To Sum Up
Effectively restoring sewage damage hinges on following a methodical approach. By evaluating the damage, prioritizing safety, and thoroughly cleaning and drying the area, you can mitigate health risks and prevent further issues. It’s essential to remember that neglecting any step can lead to recurring problems. Regular maintenance and monitoring of plumbing systems not only safeguard your property but also validate the theory that proactive measures are vital for long-term success in sewage damage restoration.